
Learn how to navigate, create, edit, delete and embed Dataset Completeness Measures
Where to find Dataset Completeness Measures
Dataset Completeness Measures can be found by navigating to Self Service Dataset Collection, following a Dataset link and then clicking on the Completeness Measures tab.

From here you can Add/Edit/Delete measures along with being able to copy the embed HTML code for use in Dashboards or an external website CMS that supports HTML snippets.
Create a Dataset Completeness Measure
- Firstly on the list view, click the Add button.
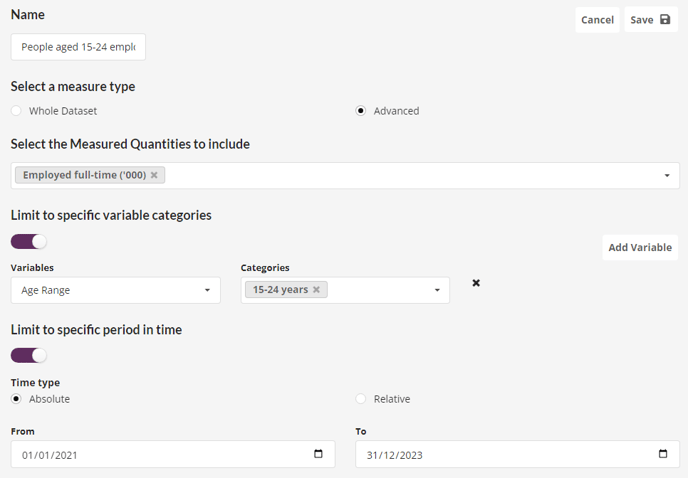
- The first step is giving your measure a name, try and be descriptive and base it on how you configure the measure to make it easy to interpret. You can always come back to this step.
- Next pick between creating the measure at "Whole Dataset" level or using "Advanced" configuration.
- A whole dataset measure needs no further configuration and if that is your preference click the save button to finish up.
- Advanced measures need further configuration. Continue the steps below in that case.
- With advanced measures, you must select which Measured Quantities you wish to include. Use the dropdown to do this.
- Note that dataset tables that don't have the measured quantity set are excluded from the calculation so this is a good way to narrow down to specific tables if there is separation between the Measured Quantities across them.
- The next step is to decide if you wish to limit the measure to specific categories for a given variable. If you choose to do so, use the dropdowns to make your selections and use the Add Variable button to add multiple limits.
- In this instance, a table is only excluded from a calculation if the variable is set on it but none of the categories on the table match the filter. This is checked for all of the limited variables. Where the limit is valid for a table and it is included, only data cells that match the limits will be considered in the calculation.
- The final piece of configuration is to decide whether to limit to a specific time period. If you choose to do so, you must pick between an absolute time period which will require a from and to date for which data to include, and a relative time where you pick out the unit of time to use (Day/Week/Month/Year) and a value for how far back from the current time you wish to calculate for.
- An image of what the form looks like when using relative time periods:
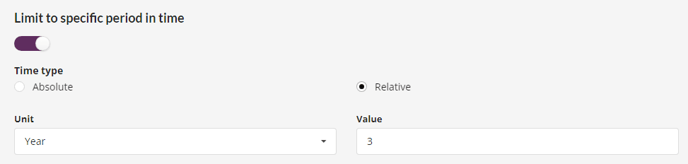
- Note that with relative time the supported time based variables are "Year", "Year Month" and "Year Quarter". Only tables that have one of the supported time variables set will have the time range applied when considering which data cells to include in the calculation.
- An image of what the form looks like when using relative time periods:
- Click Save to finish creating the measure.
Edit or Delete a Dataset Completeness Measure
- Simply click on the Edit or Delete button on the relevant measure in the Dataset Completeness Measures tab list.
Embed a Dataset Completeness Measure in Dashboards
- Click Copy on the relevant measure in the Dataset Completeness Measures tab list to copy the embed HTML code to your clipboard.
- Head over to your Dashboard, add a HTML block and paste the code in to display the measure.